How to Plant a Tree
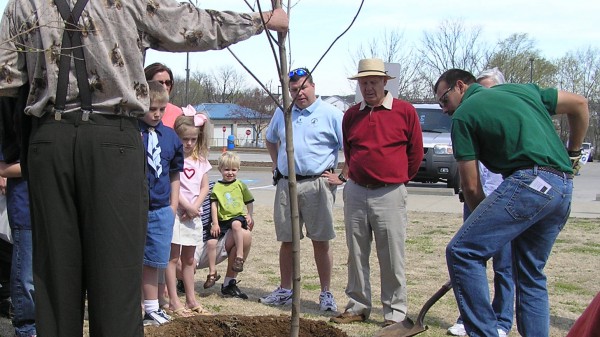
Why Should You Consider Planting Trees?
Well-placed shade trees can lower your roof and wall temperatures and help save over 15% on your electrical bills. Shading and cooling and air conditioning unit can increase its efficiency by 10%.
Trees can help your property value. Trees add beauty to neighborhoods and can add considerable value to the typical Bowling Green home, which helps to stabilize property values.
Trees help clean the air by removing poisonous gases and particulates such adjusts and pollens. They produce vital oxygen for us to breathe and absorb carbon dioxide, one of the so-called “greenhouse gases.” You can visit the i-Tree Design Benefit Calculator to learn more.
Trees provide food, nesting sites and protection to the birds, mammals and other wildlife that help fill our lives and our children’s lives with beautiful sights,sounds, diversity and wonderment.
What better way to remember a friend?
How to Plant: Step by Step Summary
Recommended Equipment to use when planting your tree:
- A shovel and a rake
- A pick ax if your soil is compacted
- A bag of mulch (usually 3 cubic feet)
- A bag or two of topsoil (only for very rocky or infertile soils)
- A source of clean water
Step 1: Mark It
Pick the best spot for your tree according to its cultural requirements. Remove an area of turf at least two to three times the width of the root ball.
Step 2: Can You Dig It?
Dig the hole with sloping sides as shown in the diagram. The hole should be two to three times the width of the root ball. The hole should be the same depth of the soil in the container or, in the case of a B&B tree, the height of the root ball, never deeper.
Step 3: Remove The Container
Remove or cut away the container just before the tree is put in the hole. Be sure to cut any circling roots. Move the tree by the root ball, not the trunk. Minimize the time that the roots are exposed to air and direct sunlight. Remove the wire basket now if the root ball will remain intact. If not, place the tree in the planting hole and remove as much as possible without breaking up the root ball.
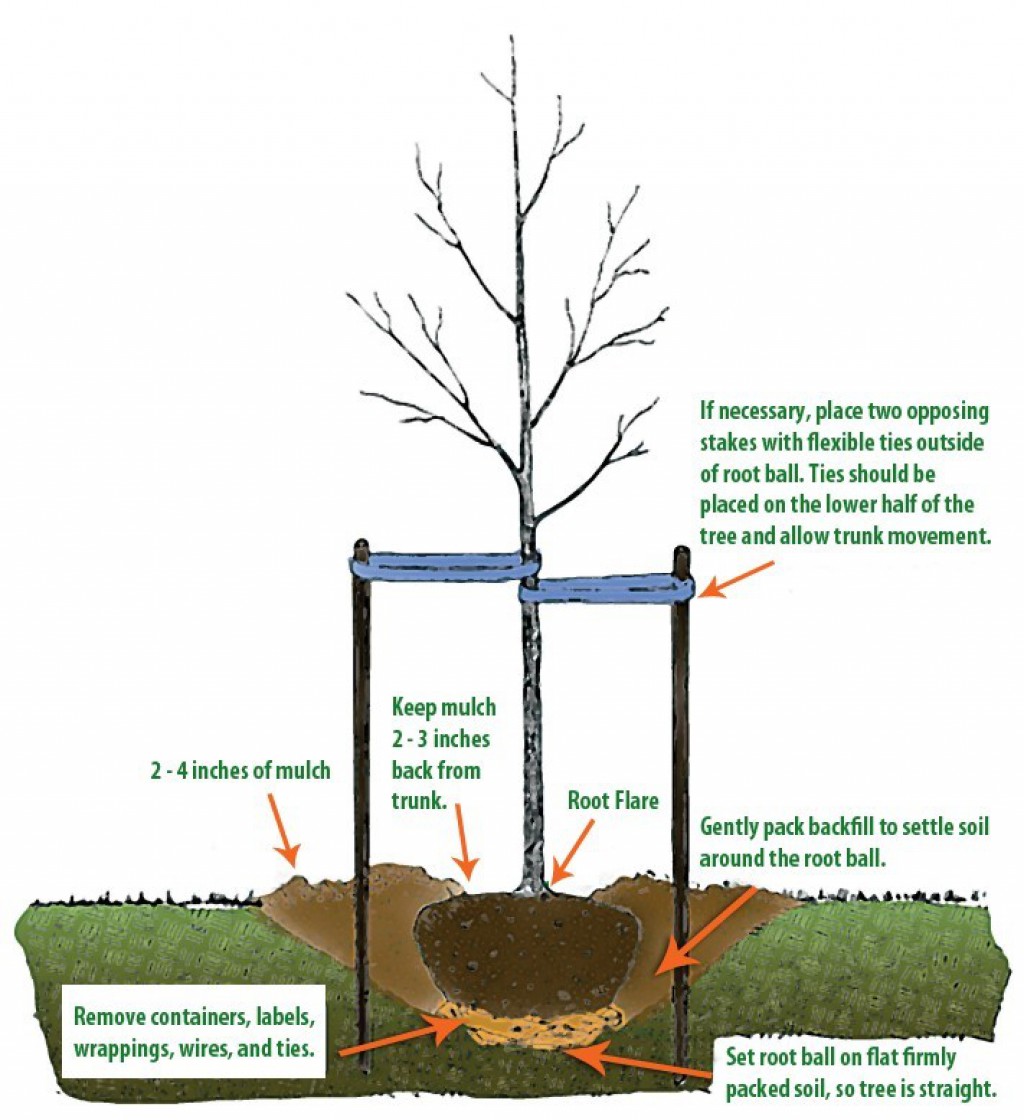
Step 4: Plant It
Set the root ball in the hole and adjust it until the 'best' side faces the direction you want and the top of the root ball is about one inch above the surrounding soil level. . A straight stick or shovel handle laid across the hole will help you decide if adjustment is needed. Be careful not to plant too deep! If you have a B&B tree now is the time to cut away any strings from around the trunk and to fold back the top 1/3 of the burlap down into the planting hole. Also remove any tags or labels.
Step 5: Fill The Hole
Use the soil that you removed from the hole to back-fill around the root ball. If the soil is full of rocks, remove the larger rocks over 2”-3”. Break up any chunks of soil. If the soil is very poor mix it with good topsoil. Do not use other amendments such as peat or compost.
Step 6: Water In
When the hole is 2/3 full fill it with water and mix the mud with your shovel to settle the soil and remove any air pockets. Finish back-filling the hole and tamp the soil around the root ball but do not compact it.
Step 7: Mulch
Put a three inch layer of mulch around the tree. Mulch helps to keep grass out, saves water and keeps lawn equipment such as string trimmers from damaging the thin bark of the young tree. Do not pile mulch up on the tree trunk.
Step 8: Stake
Stakes and wide soft ties should be used only when the tree can’t stand by itself. When used this support should be removed after one year or less.
Step 9: Admire
Admire your handy work
Selecting and Planting Trees in Your Landscape
Matching the right tree to your site is the most important aspect of tree selection. A tree that is not suited to its planting site will perform poorly, require more maintenance, and ultimately die before its time.
Cultural Requirements
- How much light does the site receive?
- What type of Soil are you planting in?
- Is the area susceptible to Water problems?
- Is the tree tolerant of pests common to the area?
- Will the tree tolerate pollution, salt spray?
- Is the plant Hardy in your area? Zone 6
Space / Site Restrictions
- How much space is available?
- Are there any utilities near?
- Overhead wires
- Underground pipes, wires
- Would the tree affect sidewalks?
- Foot traffic
- Invasive roots
- Would the tree affect buildings?
- Roots in foundations
- Sight lines
- Consider Maintenance Issues
- Messy Fruits
- Fall leaf Drops
What is the desired function of your tree?
- Shade Screen / Windbreak
- Ornamental / Accent Flower
- Fruit
- Foliage
Where to Plant
Sketch Out Your Plans - First, draw a rough diagram of your lot, including the house and any existing landscaping.
Consider The Benefits Of Shading - After completing the diagram of your lot,consider placing your shade trees on the side of the house that receives the most direct sun during the day.
Plan For Growth hen Evaluating Locations - Make sure you give your tree adequate room to grow. Try to envision it 5,10, or even 50 years into the future. know what a tree will look like at maturity and consider height, crown spread and root space when planting.
Other Design Considerations
- Splitting
- Try to locate your tree in a position where it will not split your lot or view into equal halves.
- Framing
- To give your lot the appearance of greater depth, plant on a diagonal line outward from the corners of the house.
- Background
- Plant trees on the side or back of your home.
- Accent
- Small flowering trees can beautify and accent patios, pools or play areas.
- Utilities
- Consider the tree’s mature size in relation to overhead and underground utilities.
Things To Avoid
- Enclosing the root zone in concrete.
- Planting over or too near buried utilities or sprinkler system
- Planting tall trees under utility lines.
- Spreading branches that may tangle with wires or roof leaves.
- Shading gardens or other desirable sunny spots.
- Blocking windows or scenic views.
- Interfering with outdoor lighting.
- Covering chimneys.
- Encroaching on your neighbor’s property.
- Covering traffic signs or blocking views at street corners.

Choosing nursery stock
- Trees are generally available in three forms
- Containerized
- Balled and Burlapped ( B & B )
- Bare Root
What to look for in nursery stock
- Inspect Trees for Quality and Health
- Vigorous plant Good twig extension - growth
- Good branch spacing and trunk taper
- Evenly distributed, healthy foliage
- Solid, moist root ball
- Abundant roots, light in color
What to avoid in nursery stock
- Inspect for Poor quality plants
- Missing or damaged central leader
- Mechanical injury, damage to bark, trunk or branches
- Desiccated, discolored or shriveled leaves
- Girdled, circling, or kinked roots
What to avoid in nursery stock
- Soft, brown or black non-woody roots
- Presence of insects or disease
- Discolored, sunken, or swollen areas of trunk
Tree Planting Preparation
Planting Seasons, Proper Timing: Bare Root
- Early spring as soon as soil becomes workable
- Container and B&B: early fall through late spring
- Plantings done in summer require more watering and maintenance, are more prone to failure
Pre-planting Care: Protect Trees From
- Mechanical injury
- Desiccation, (drying out)
- Overheating
- Trees should be planted soon after purchase or heeled in, in cool, sheltered location and kept moist
- Always carry trees by the root ball or container, never lift tree by the trunk, this extra movement causes the fine feeder roots to break away and die
Planting Site Preparation
- Planting hole should accommodate root system comfortably
- Hole should be 2-3 times width of root ball, sloping down to width of root ball at base
- Hole should be just deep enough to allow root collar or trunk flare to be level or slightly higher than surface grade
Plant Preparation
- Due to production techniques, B&B and container trees often arrive planted too deep in the ball
- It is imperative that the natural root flare be located before planting
- Top of root ball should be even or slightly higher than surrounding grade when planted
Planting Site Soil Conditions
- Heavy clay, poorly drained, and compacted soil
- Hole should be dug wider and shallower to allow as much as 4 inches of root ball to protrude above surrounding grade.
- Gradually slope the soil up from the grade to meet the edge of the root ball.
- Do not dig deeper than necessary, tree needs firm support to keep from settling.
- Soil removed from hole should be used as backfill, soil amendments have not proven beneficial.
Tree Planting and Installation
Planting Procedures: Bare Root Trees
- Vital that roots be kept moist
- Normally planted only in dormant season
- If not planted immediately, must be stored cold ( 32- 40 degrees F )
- Dig planting hole no deeper than root collar (point where roots flare from trunk)
- Dig planting hole wide enough to allow even distribution and spreading of roots.
- Plant tree on small cone shaped mound within planting hole
- Spread roots evenly over mound
- Adjust trees depth to allow root collar to match surrounding grade
- Add backfill in layers until hole is 3/4 full
- Water gently to remove air pockets, adjust tree and complete fill
- Because the root system is limited, bare root trees frequently require staking
Planting Procedures: Containerized Trees
- Tree should be well rooted and established in the container
- Gently remove container and inspect for circling roots
- Make 4-5 vertical cuts along side of root mass with sharp knife to sever any circling roots
- Gently tease roots out of root mass to prevent girdling
- Lower tree into hole making sure top of root mass is at or slightly higher than surrounding grade, adjust tree to upright position
- Backfill layers of soil over the roots until hole is 1/2 full
- Lightly tamp soil with hand or shovel to remove air pockets
- Complete backfill and water thoroughly
Planting Procedures: Balled and Burlapped Trees
- Root ball size is based on trunk caliper
- Ball should not be excessively wet or dry
- Ball should be held securely with twine and burlap, wire basket for larger trees
- Trunk should be centered in root ball
- Trunk should not move independently of root ball
Planting Procedures Balled and Burlapped Trees
- Always handle tree by root ball
- Remove wire basket ( if present ) completely if the root ball will stay together.
- If root ball appears slightly loose, leave wire basket in place and remove at least the upper 1/3 after placing in hole
- Remove burlap completely if synthetic or treated, it will NOT biodegrade
- Gently lower or roll root ball into hole
- Adjust tree to upright position
- Backfill layers of soil until hole is 1/2 full
- Lightly tamp soil to eliminate air pockets
- Remove all twine from around trunk to prevent girdling
- Remove top 1/3 of wire basket if it wasn't removed earlier
- Cut away burlap from the top 1/3 of root ball allowing water to freely penetrate to the roots
- Complete backfilling and water thoroughly
- Remove all tags and labels to prevent girdling limbs
Common Planting Problems
- Planting too deep - suffocates roots
- Planting too shallow - roots dry out
- Hole too narrow - root system struggles to establish
- Soft fill added to bottom of hole - plant settles too deeply
- Twine left on trunk - girdles trunk Wire basket left intact - girdles roots
- Container tree circling roots left intact - root system girdles